背景
由于我个人电脑是2020款m1,16G,256G。一方面,平时除了运行多个浏览器,还有coding 编辑器等等,内存确实很紧张。其次呢,m1 是ARM的架构,所以构建的镜像是无法在X86的机器上运行的。所以我尝试将docker引擎和client分开。
第一步:下载二进制docker 客户端文件
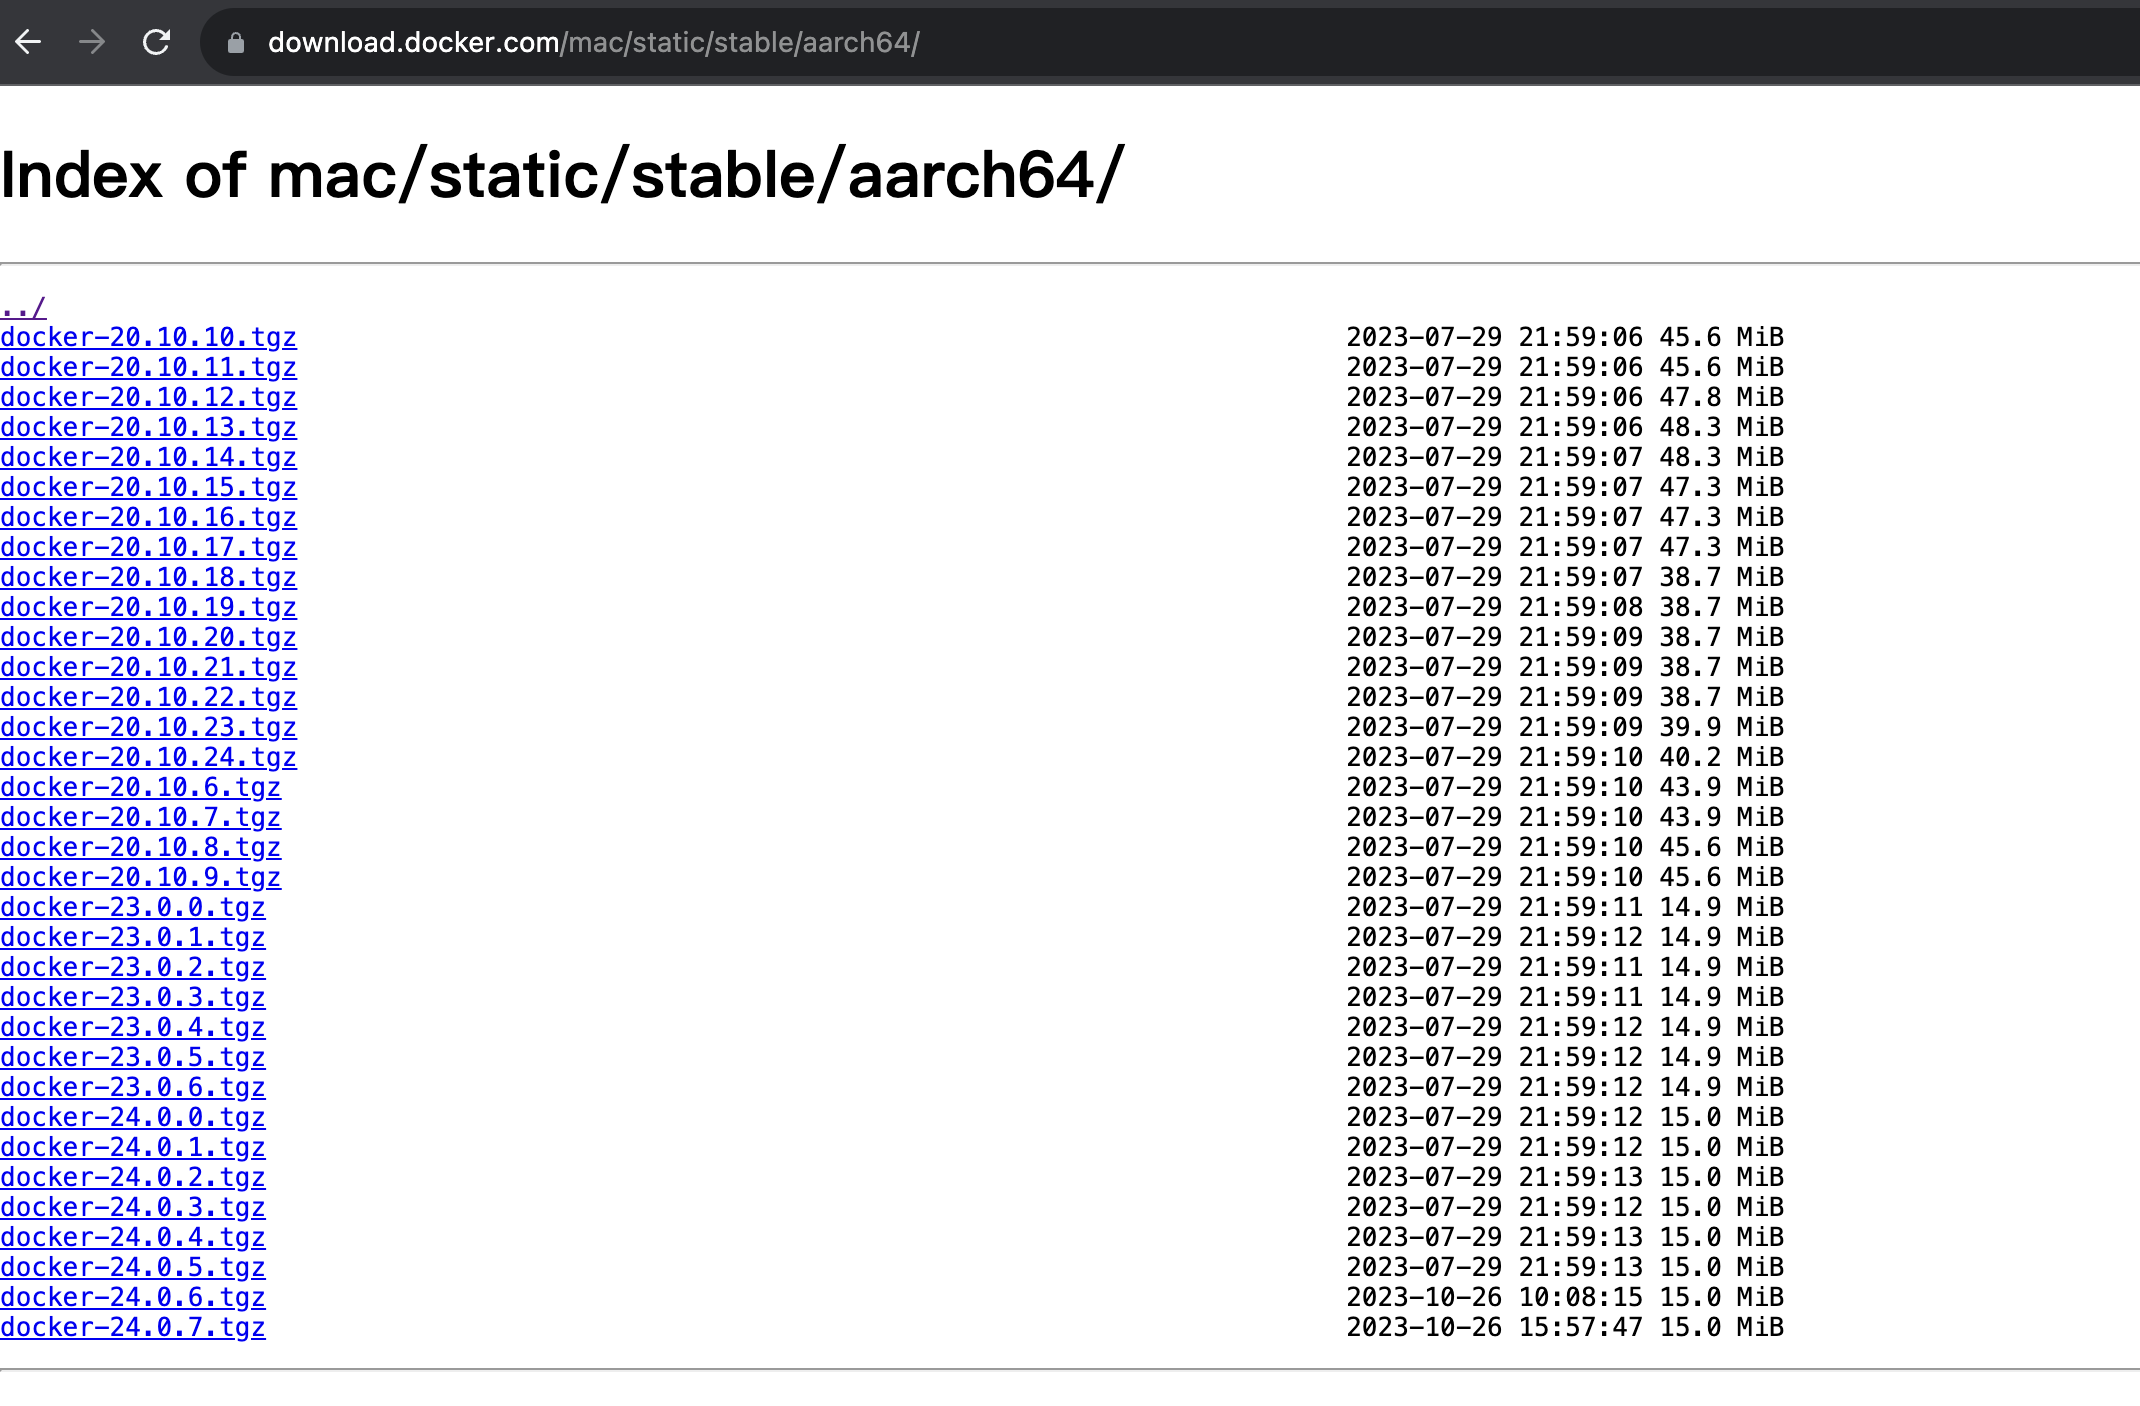
二进制client下载链接:传送门
如果是苹果选择aarch64,进去后选择版本(我选择的是最新版本)

第二步:安装docker
注意:
1、除了要安装docker以外,还需要开启api端口,因为客户端需要和服务端通过远程端口进行通信
2、个人安装的最新版本
3、注意开启2375端口,确保能telnet通
docker安装文档:传送门
配置远程端口:
Docker 启动文件添加-H tcp://0.0.0.0:2375
vim /usr/lib/systemd/system/docker.service
···
[Unit]
Description=Docker Application Container Engine
Documentation=https://docs.docker.com
After=network-online.target docker.socket firewalld.service containerd.service time-set.target
Wants=network-online.target containerd.service
Requires=docker.socket

[Service]
Type=notify
# the default is not to use systemd for cgroups because the delegate issues still
# exists and systemd currently does not support the cgroup feature set required
# for containers run by docker
# ExecStart=/usr/bin/dockerd -H fd:// --containerd=/run/containerd/containerd.sock
### 注意这里,我复制了一行
ExecStart=/usr/bin/dockerd -H fd:// -H tcp://0.0.0.0:2375 --containerd=/run/containerd/containerd.sock
ExecReload=/bin/kill -s HUP $MAINPID
TimeoutStartSec=0
RestartSec=2
Restart=always

# Note that StartLimit* options were moved from "Service" to "Unit" in systemd 229.
# Both the old, and new location are accepted by systemd 229 and up, so using the old location
# to make them work for either version of systemd.
StartLimitBurst=3

# Note that StartLimitInterval was renamed to StartLimitIntervalSec in systemd 230.
# Both the old, and new name are accepted by systemd 230 and up, so using the old name to make
# this option work for either version of systemd.
StartLimitInterval=60s
···
第三步:解压并添加环境变量
解压文件后如下:

添加环境变量
注意:
使用$PATH命令查看环境变量
# 查看环境变量
$PATH
/Users/lanjx/opt/anaconda3/bin:/Users/lanjx/.nvm/versions/node/v16.18.0/bin:....太长了,忽略
# 将图中文件解压到环境变量对应的目录中
sudo cp DownLoads/docker/docker /usr/local/sbin/
sudo chmod +x /usr/local/sbin/docker
# 添加环境变量
vim .zshrc
# 将下面一句添加到文件末尾
...
export DOCKER_HOST=tcp://192.168.0.1:2375
修改文件
vim ~/.docker/config.json
{
        "auths": {
                 "docker.cnblogs.com": {}
        },
        "credsStore": "desktop",
        "currentContext": "default",
  			// 添加了下面这一行
        "hosts": ["tcp://192.168.0.1:2375"]
}
第四步:测试
到这里基本上已经差不多了,剩下的就是补全剩余的组件即可
docker info
Client:
 Version:    24.0.7
 Context:    default
 Debug Mode: false
 Plugins:
WARNING: Plugin "/Users/lanjx/.docker/cli-plugins/docker-buildx" is not valid: failed to fetch metadata: fork/exec /Users/lanjx/.docker/cli-plugins/docker-buildx: no such file or directory
WARNING: Plugin "/Users/lanjx/.docker/cli-plugins/docker-compose" is not valid: failed to fetch metadata: fork/exec /Users/lanjx/.docker/cli-plugins/docker-compose: no such file or directory
WARNING: Plugin "/Users/lanjx/.docker/cli-plugins/docker-dev" is not valid: failed to fetch metadata: fork/exec /Users/lanjx/.docker/cli-plugins/docker-dev: no such file or directory
WARNING: Plugin "/Users/lanjx/.docker/cli-plugins/docker-extension" is not valid: failed to fetch metadata: fork/exec /Users/lanjx/.docker/cli-plugins/docker-extension: no such file or directory
WARNING: Plugin "/Users/lanjx/.docker/cli-plugins/docker-init" is not valid: failed to fetch metadata: fork/exec /Users/lanjx/.docker/cli-plugins/docker-init: no such file or directory
WARNING: Plugin "/Users/lanjx/.docker/cli-plugins/docker-sbom" is not valid: failed to fetch metadata: fork/exec /Users/lanjx/.docker/cli-plugins/docker-sbom: no such file or directory
WARNING: Plugin "/Users/lanjx/.docker/cli-plugins/docker-scan" is not valid: failed to fetch metadata: fork/exec /Users/lanjx/.docker/cli-plugins/docker-scan: no such file or directory
WARNING: Plugin "/Users/lanjx/.docker/cli-plugins/docker-scout" is not valid: failed to fetch metadata: fork/exec /Users/lanjx/.docker/cli-plugins/docker-scout: no such file or directory

Server:
 Containers: 2
  Running: 0
  Paused: 0
  Stopped: 2
 Images: 0
 Server Version: 24.0.6
 Storage Driver: overlay2
  Backing Filesystem: extfs
  Supports d_type: true
  Using metacopy: false
  Native Overlay Diff: true
  userxattr: false
 Logging Driver: json-file
 Cgroup Driver: cgroupfs
 Cgroup Version: 1
 Plugins:
  Volume: local
  Network: bridge host ipvlan macvlan null overlay
  Log: awslogs fluentd gcplogs gelf journald json-file local logentries splunk syslog
 Swarm: inactive
 Runtimes: io.containerd.runc.v2 runc
 Default Runtime: runc
 Init Binary: docker-init
 containerd version: 61f9fd88f79f081d64d6fa3bb1a0dc71ec870523
 runc version: v1.1.9-0-gccaecfc
 init version: de40ad0
 Security Options:
  seccomp
   Profile: builtin
 Kernel Version: 3.10.0-1160.80.1.el7.x86_64
 Operating System: CentOS Linux 7 (Core)
 OSType: linux
 Architecture: x86_64
 CPUs: 8
 Total Memory: 15.49GiB
 Name: localhost.localdomain
 ID: 1e789c39-61f4-4269-8616-47944d1865cb
 Docker Root Dir: /data/docker
 Debug Mode: false
 Experimental: false
 Insecure Registries:
  127.0.0.0/8
 Registry Mirrors:
  https://registry.docker-cn.com/
  https://docker.mirrors.ustc.edu.cn/
 Live Restore Enabled: false

WARNING: API is accessible on http://0.0.0.0:2375 without encryption.
         Access to the remote API is equivalent to root access on the host. Refer
         to the 'Docker daemon attack surface' section in the documentation for
         more information: https://docs.docker.com/go/attack-surface/
第五步:补全插件
方法一:
可以去github上挨个下载(这样太麻烦了,可能还上不去这个网站):传送门
方法二:
下载桌面版,解压开复制里面的文件
这种方法简单粗暴,补全后删除即可
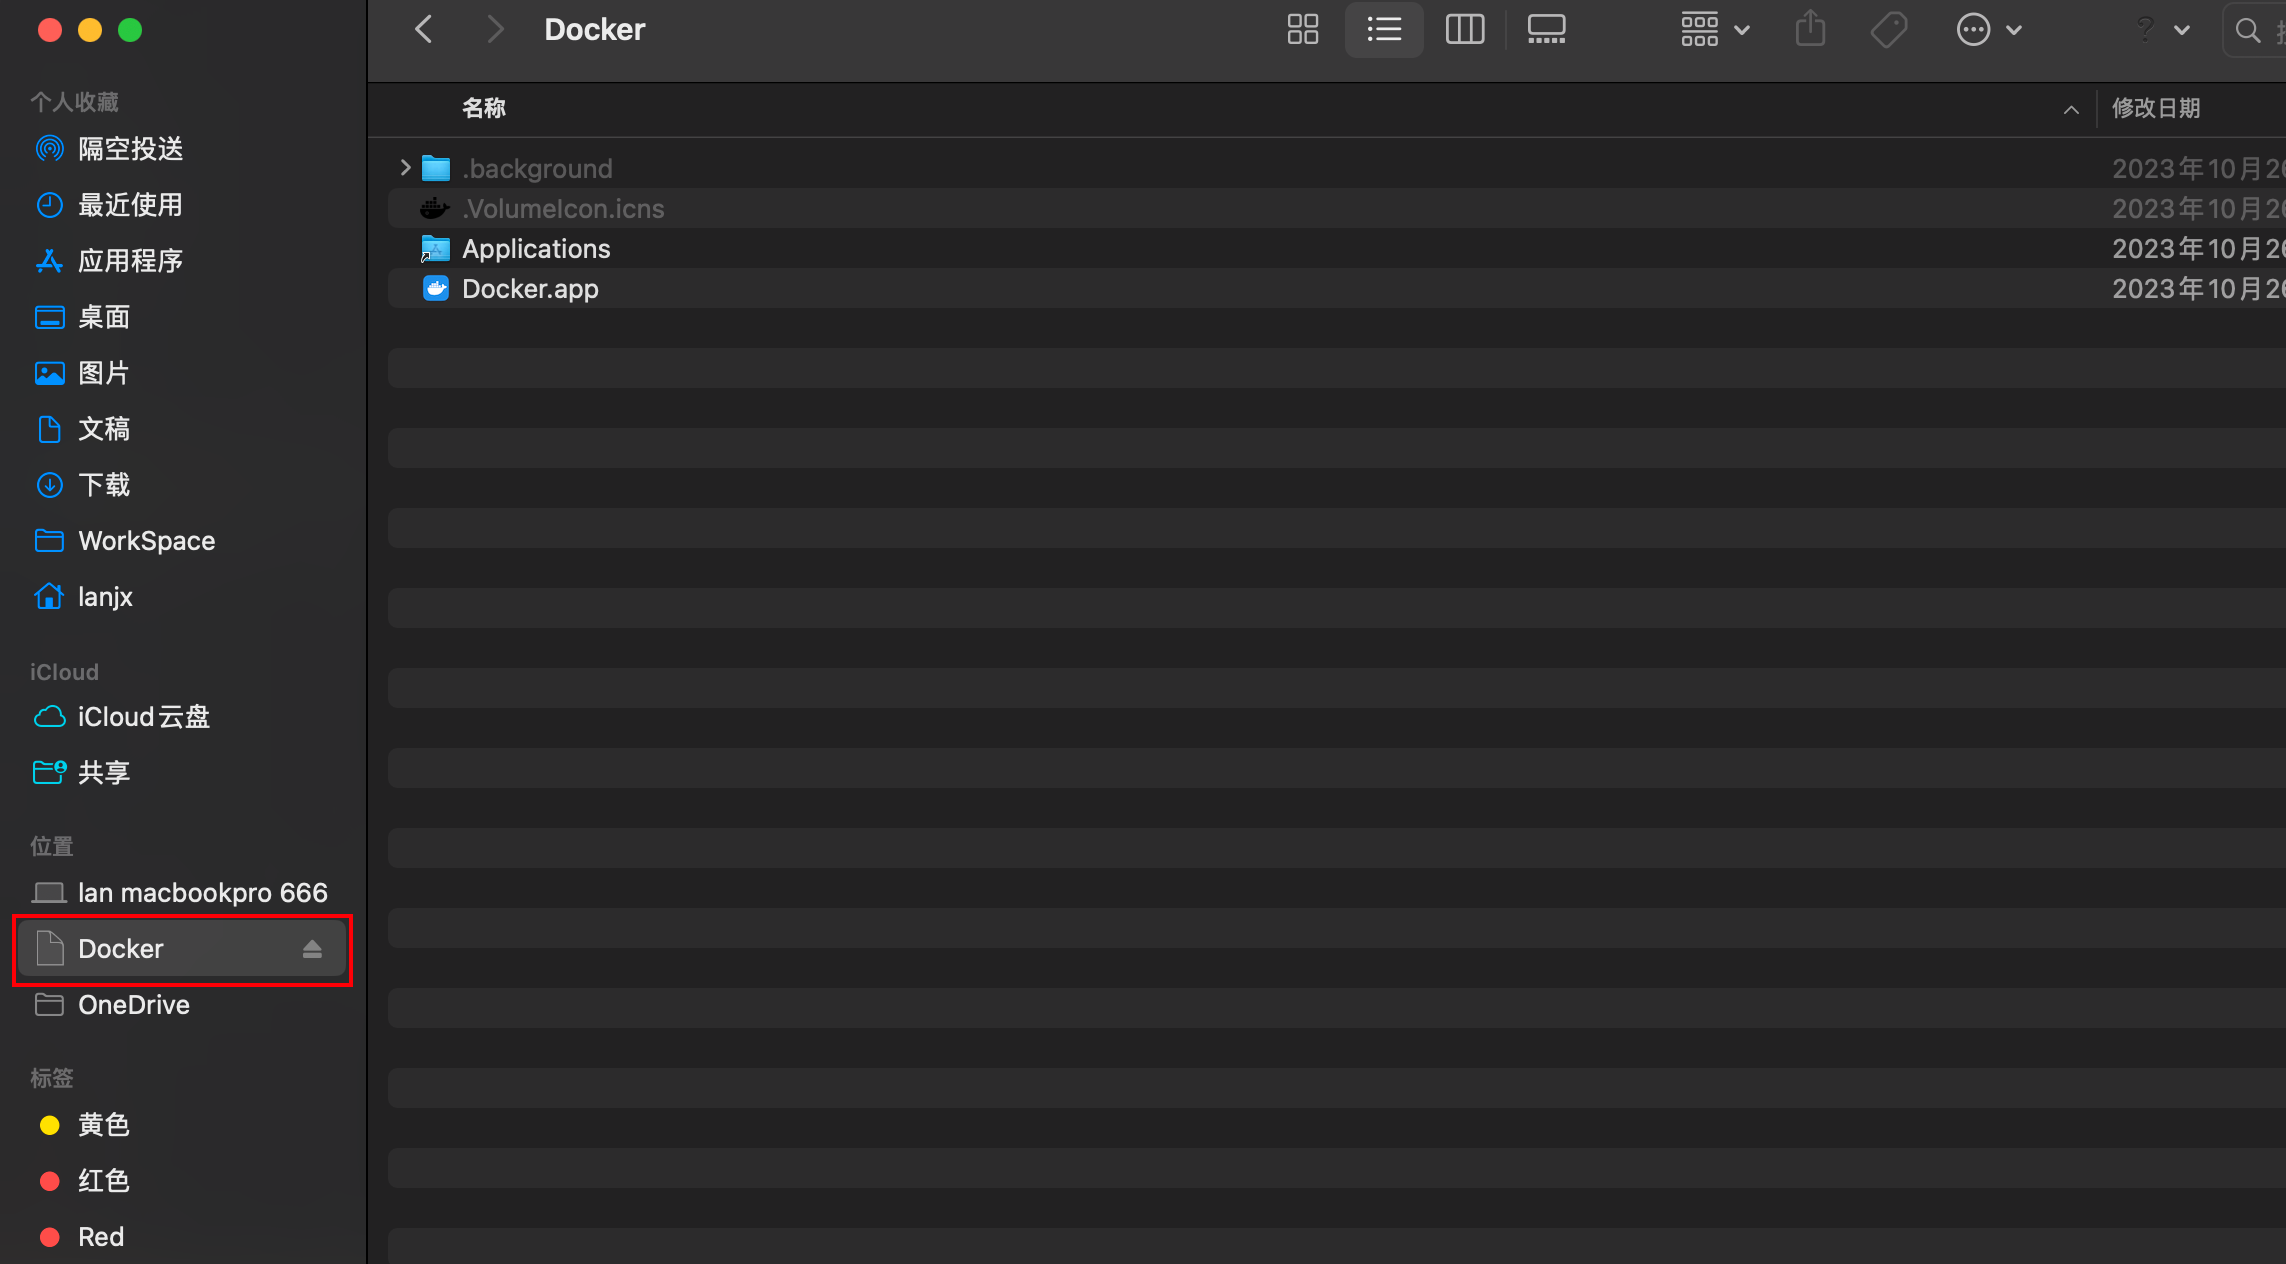
下载链接:传送门,下载完成后,如下图:

双击打开后,访达中会有这样一个东西。

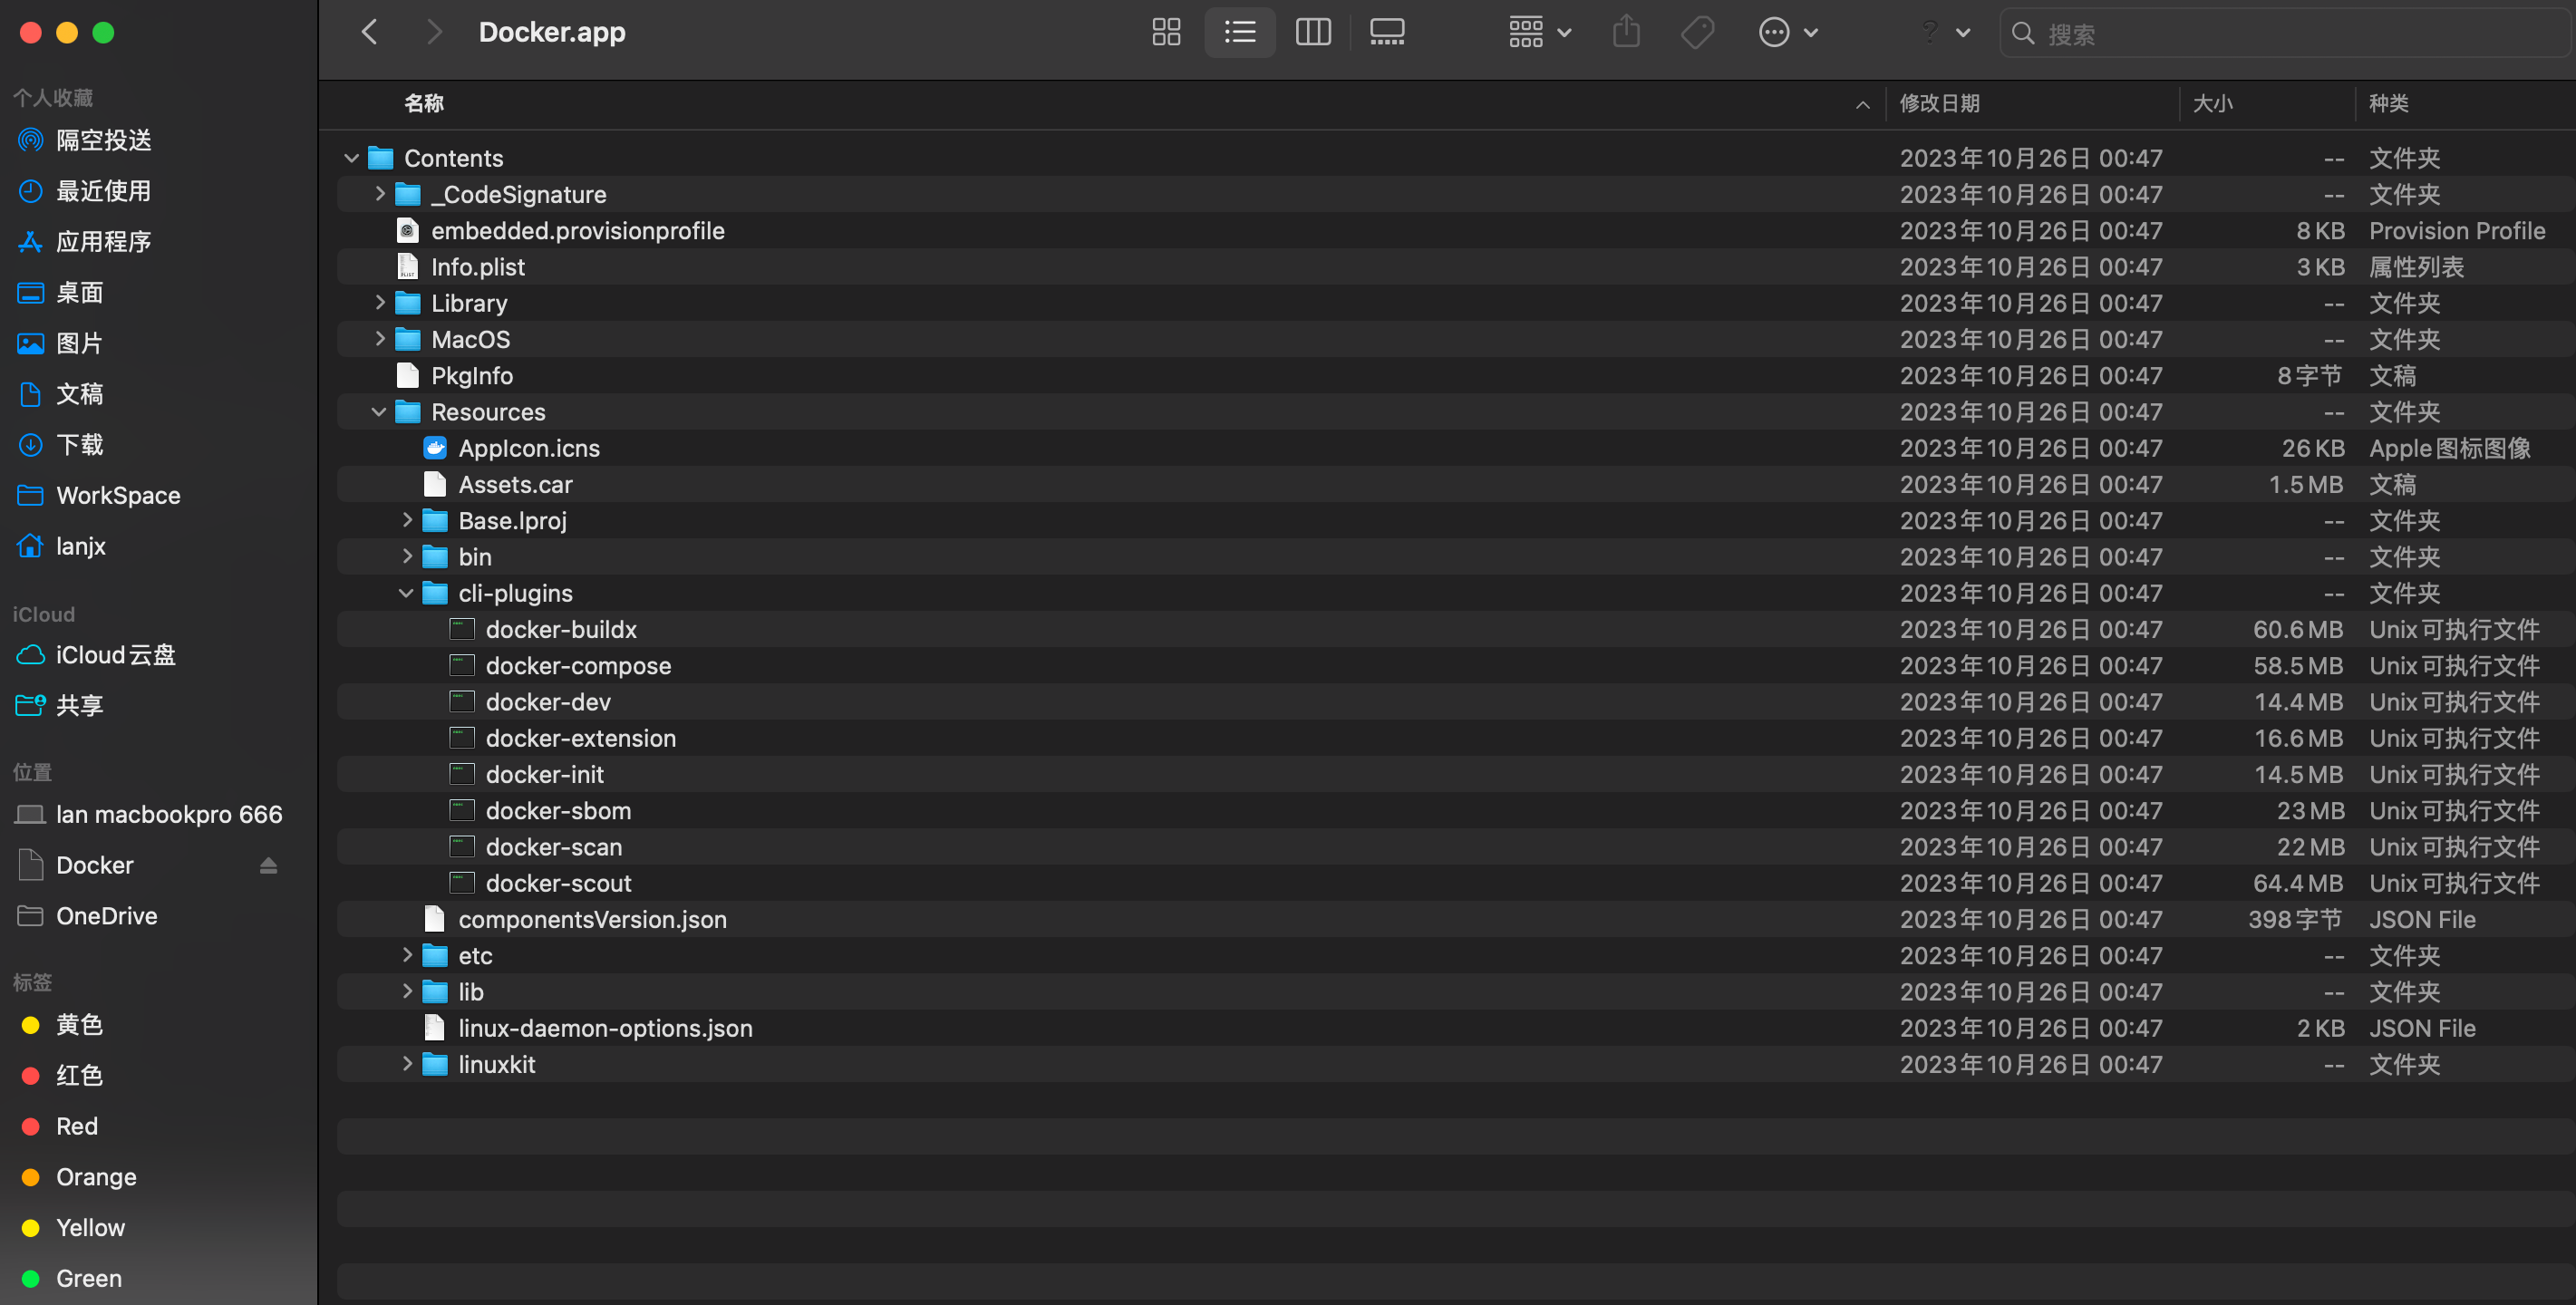
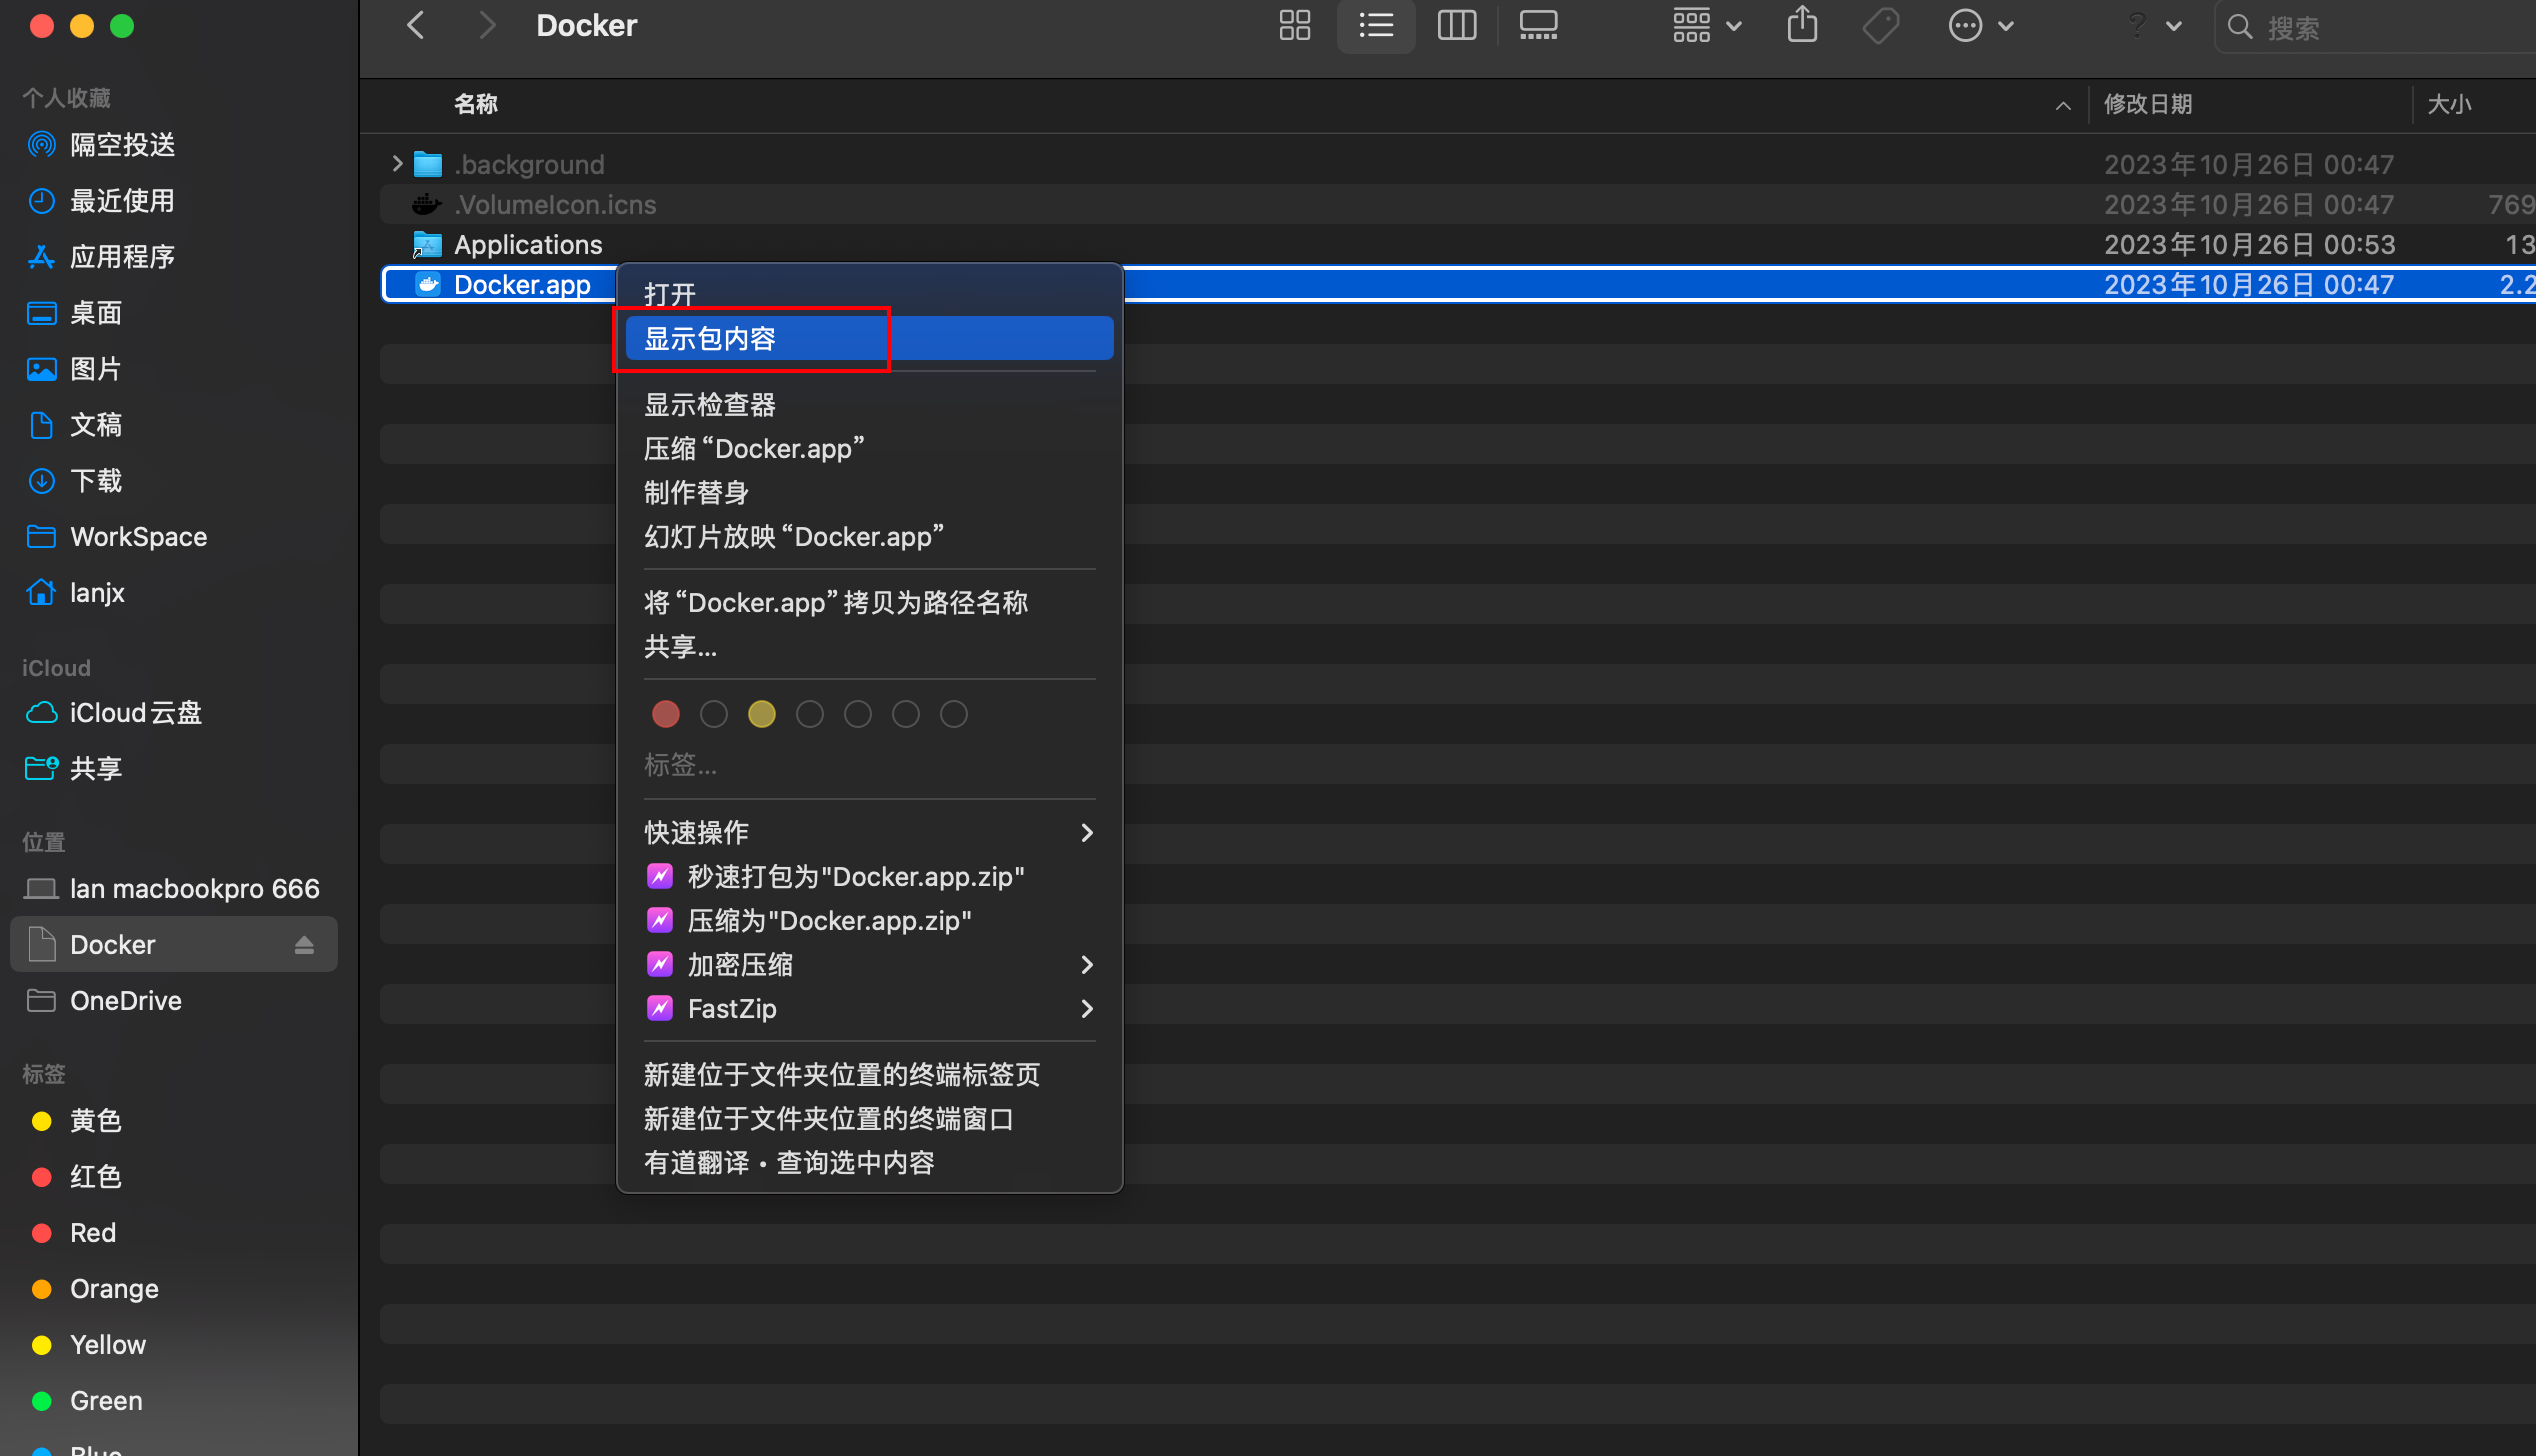
然后右击Docker.app,选择显示包内容,接着复制如下目录的文件到/Users/lanjx/.docker/cli-plugins(注意用户名,根据自己的实际路径来)


接下来给权限
sudo chmod +x /Users/lanjx/.docker/cli-plugins/*
到这里就结束啦,重启终端,看看效果~


