本篇内容:
后端 + 前端简单HTML页面
功能场景点:
1. 群发,所有人都能收到
2. 局部群发,部分人群都能收到
3. 单点推送, 指定某个人的页面
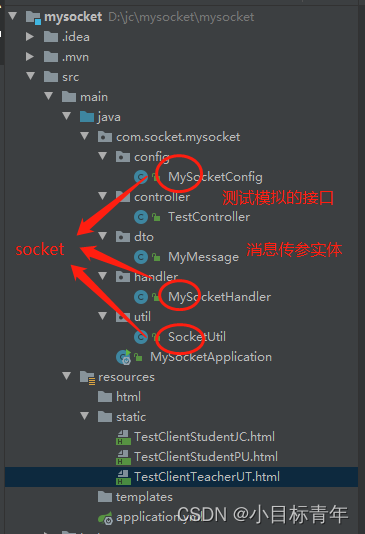
惯例,先看看本次实战示例项目结构:

可以看到内容不多,也就是说,springboot 整合socket, 跟着我学,轻轻松松。
古有曹植七步成诗,如今,咱们也是 7步学会整合socket!
不多说,开始:
① pom引入核心依赖
            com.alibaba
            fastjson
            1.2.75


            com.corundumstudio.socketio
            netty-socketio
            1.7.7


            org.springframework.boot
            spring-boot-starter-web


            org.springframework.boot
            spring-boot-starter-test
            test
② yml加上配置项
server:
  port: 8089

socketio:
   host: localhost
   port: 8503
   maxFramePayloadLength: 1048576
   maxHttpContentLength: 1048576
   bossCount: 1
   workCount: 100
   allowCustomRequests: true
   upgradeTimeout: 10000
   pingTimeout: 60000
   pingInterval: 25000
③ 创建socket配置加载类 MySocketConfig.java
import com.corundumstudio.socketio.SocketConfig;
import com.corundumstudio.socketio.SocketIOServer;
import com.corundumstudio.socketio.annotation.SpringAnnotationScanner;
import org.springframework.beans.factory.annotation.Value;
import org.springframework.context.annotation.Bean;
import org.springframework.context.annotation.Configuration;

/**
 * @Author: JCccc
 * @Description:
 * @Date: 2022/06/13 21:50
 */
@Configuration
public class MySocketConfig{

    @Value("${socketio.host}")
    private String host;

    @Value("${socketio.port}")
    private Integer port;

    @Value("${socketio.bossCount}")
    private int bossCount;

    @Value("${socketio.workCount}")
    private int workCount;

    @Value("${socketio.allowCustomRequests}")
    private boolean allowCustomRequests;

    @Value("${socketio.upgradeTimeout}")
    private int upgradeTimeout;

    @Value("${socketio.pingTimeout}")
    private int pingTimeout;

    @Value("${socketio.pingInterval}")
    private int pingInterval;

    @Bean
    public SocketIOServer socketIOServer() {
        SocketConfig socketConfig = new SocketConfig();
        socketConfig.setTcpNoDelay(true);
        socketConfig.setSoLinger(0);
        com.corundumstudio.socketio.Configuration config = new com.corundumstudio.socketio.Configuration();
        buildSocketConfig(socketConfig, config);
        return new SocketIOServer(config);
    }

    /**
     * 扫描netty-socketIo的注解( @OnConnect、@OnEvent等)
     */
    @Bean
    public SpringAnnotationScanner springAnnotationScanner() {
        return new SpringAnnotationScanner(socketIOServer());
    }

    private void buildSocketConfig(SocketConfig socketConfig, com.corundumstudio.socketio.Configuration config) {
        config.setSocketConfig(socketConfig);
        config.setHostname(host);
        config.setPort(port);
        config.setBossThreads(bossCount);
        config.setWorkerThreads(workCount);
        config.setAllowCustomRequests(allowCustomRequests);
        config.setUpgradeTimeout(upgradeTimeout);
        config.setPingTimeout(pingTimeout);
        config.setPingInterval(pingInterval);
    }
}
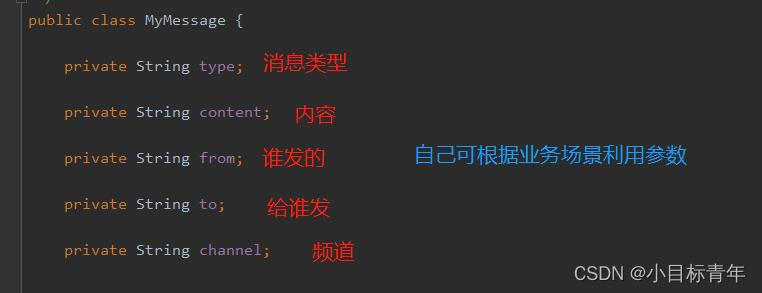
④创建消息实体 MyMessage.java
/**
 * @Author: JCccc
 * @Date: 2022-07-23 9:05
 * @Description:
 */
public class MyMessage {

    private String type;

    private String content;

    private String from;

    private String to;

    private String channel;


    public String getType() {
        return type;
    }

    public void setType(String type) {
        this.type = type;
    }

    public String getContent() {
        return content;
    }

    public void setContent(String content) {
        this.content = content;
    }

    public String getFrom() {
        return from;
    }

    public void setFrom(String from) {
        this.from = from;
    }

    public String getTo() {
        return to;
    }

    public void setTo(String to) {
        this.to = to;
    }

    public String getChannel() {
        return channel;
    }

    public void setChannel(String channel) {
        this.channel = channel;
    }
}
代码简析:
⑤创建 socket handler 负责记录客户端 连接、下线
MySocketHandler.java
import com.corundumstudio.socketio.SocketIOClient;
import com.corundumstudio.socketio.SocketIOServer;
import com.corundumstudio.socketio.annotation.OnConnect;
import com.corundumstudio.socketio.annotation.OnDisconnect;
import com.socket.mysocket.util.SocketUtil;
import org.springframework.beans.factory.annotation.Autowired;
import javax.annotation.PostConstruct;
import javax.annotation.PreDestroy;
import org.slf4j.Logger;
import org.slf4j.LoggerFactory;
import org.springframework.stereotype.Component;


/**
 * @Author: JCccc
 * @Description:
 * @Date: 2022/6/23 21:21
 */
@Component
public class MySocketHandler {
    private final Logger log = LoggerFactory.getLogger(this.getClass());
    @Autowired
    private SocketIOServer socketIoServer;
    @PostConstruct
    private void start(){
        try {
            socketIoServer.start();
        }catch (Exception e){
            e.printStackTrace();
        }
    }
    @PreDestroy
    private void destroy(){
        try {
        socketIoServer.stop();
        }catch (Exception e){
            e.printStackTrace();
        }
    }
    @OnConnect
    public void connect(SocketIOClient client) {
        String userFlag = client.getHandshakeData().getSingleUrlParam("userFlag");
        SocketUtil.connectMap.put(userFlag, client);
        log.info("客户端userFlag: "+ userFlag+ "已连接");
    }
    @OnDisconnect
    public void onDisconnect(SocketIOClient client) {
        String userFlag = client.getHandshakeData().getSingleUrlParam("userFlag");
        log.info("客户端userFlag:" + userFlag + "断开连接");
        SocketUtil.connectMap.remove(userFlag, client);
    }
}
代码简析:
⑥ 封装的socket 小函数
SocketUtil.java
import com.alibaba.fastjson.JSON;
import com.alibaba.fastjson.JSONObject;
import com.corundumstudio.socketio.AckRequest;
import com.corundumstudio.socketio.SocketIOClient;
import com.corundumstudio.socketio.annotation.OnEvent;
import org.slf4j.Logger;
import org.slf4j.LoggerFactory;
import org.springframework.beans.factory.annotation.Autowired;
import org.springframework.stereotype.Component;
import org.springframework.util.StringUtils;

import java.util.Map;
import java.util.Objects;
import java.util.concurrent.ConcurrentHashMap;
import java.util.concurrent.ConcurrentMap;

/**
 * @Author: JCccc
 * @Description:
 * @Date: 2022/6/23 21:28
 */
@Component
public class SocketUtil {

    private final Logger log = LoggerFactory.getLogger(this.getClass());

    //暂且把用户&客户端信息存在缓存
    public static ConcurrentMap connectMap = new ConcurrentHashMap();

    @OnEvent(value = "CHANNEL_SYSTEM")
    public void systemDataListener(String receiveMsg) {
        if (!StringUtils.hasLength(receiveMsg)){
            return;
        }
        JSONObject msgObject = (JSONObject) JSON.parse(receiveMsg);
        String userFlag = String.valueOf(msgObject.get("from"));
        String content = String.valueOf(msgObject.get("content"));
        log.info("收到用户 : {} 推送到系统频道的一条消息 :{}",userFlag,content );
    }

    public void sendToAll(Map msg,String sendChannel) {
        if (connectMap.isEmpty()){
            return;
        }
        //给在这个频道的每个客户端发消息
        for (Map.Entry entry : connectMap.entrySet()) {
            entry.getValue().sendEvent(sendChannel, msg);
        }
    }

    public void sendToOne(String userFlag, Map msg,String sendChannel) {
        //拿出某个客户端信息
        SocketIOClient socketClient = getSocketClient(userFlag);
        if (Objects.nonNull(socketClient) ){
            //单独给他发消息
            socketClient.sendEvent(sendChannel,msg);
        }
    }


    /**
     * 识别出客户端
     * @param userFlag
     * @return
     */
    public SocketIOClient getSocketClient(String userFlag){
        SocketIOClient client = null;
        if (StringUtils.hasLength(userFlag) &&  !connectMap.isEmpty()){
            for (String key : connectMap.keySet()) {
                if (userFlag.equals(key)){
                    client = connectMap.get(key);
                }
            }
        }
        return client;
    }


}
代码简析:
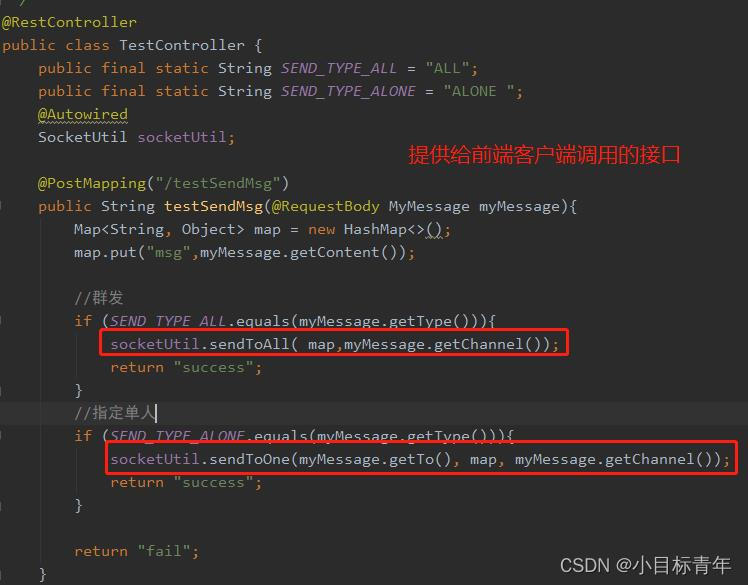
⑦写1个接口,模拟场景,前端页面调用后端接口,做消息推送
TestController.java
import com.socket.mysocket.dto.MyMessage;
import com.socket.mysocket.util.SocketUtil;
import org.springframework.beans.factory.annotation.Autowired;
import org.springframework.web.bind.annotation.*;

import java.util.HashMap;
import java.util.Map;

/**
 * @Author: JCccc
 * @Description:
 * @Date: 2022/06/13 21:50
 */
@RestController
public class TestController {
    public final static String SEND_TYPE_ALL = "ALL";
    public final static String SEND_TYPE_ALONE = "ALONE";
    @Autowired
    SocketUtil socketUtil;

    @PostMapping("/testSendMsg")
    public String testSendMsg(@RequestBody MyMessage myMessage){
        Map map = new HashMap();
        map.put("msg",myMessage.getContent());

        //群发
        if (SEND_TYPE_ALL.equals(myMessage.getType())){
            socketUtil.sendToAll( map,myMessage.getChannel());
            return "success";
        }
        //指定单人
        if (SEND_TYPE_ALONE.equals(myMessage.getType())){
            socketUtil.sendToOne(myMessage.getTo(), map, myMessage.getChannel());
            return "success";
        }

        return "fail";
    }
}
代码简析:
好了,7步了。一切已经就绪了。
前端简单页面
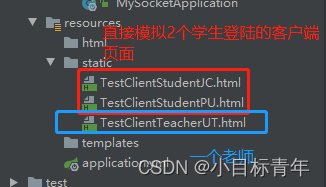
接下来搞点前端HTML页面, 玩一玩看看效果:

第一个页面:
TestClientStudentJC.html
我要连SOCKET
body {
padding: 20px;
}
#console {
height: 450px;
overflow: auto;
}
.msg-color {
color: green;
}
给系统推消息
var socket;
connect();
function connect() {
var userFlag = 'user_JC';
var opts = {
query: 'userFlag=' + userFlag
};
socket = io.connect('http://localhost:8503', opts);
socket.on('connect', function () {
console.log("连接成功");
output('当前用户是:' + userFlag );
output('连接成功了。');
});
socket.on('disconnect', function () {
output('下线了。 ');
});
socket.on('CHANNEL_STUDENT', function (data) {
let msg= JSON.stringify(data)
output('收到学生频道消息了:' + msg );
console.log(data);
});
socket.on('CHANNEL_SYSTEM', function (data) {
let msg= JSON.stringify(data)
output('收到系统全局消息了:' + msg );
console.log(data);
});
}
function sendSys() {
console.log('发送消息给服务端');
var content = document.getElementById('content').value;
socket.emit('CHANNEL_SYSTEM',JSON.stringify({
'content': content,
'from': 'user_JC'
}));
}
function output(message) {
var element = $("" + message + "
服务器托管,北京服务器托管,服务器租用,机房机柜带宽租用

咨询:董先生
电话13051898268 QQ/微信93663045!
上一篇: SpringSecurity实现前后端分离登录token认证详解1. SpringSecurity概述2.SpringSecurity 实战
下一篇: 【⑩MySQL】:表管理,让数据管理不再困难
前言
1. 基础知识
2. 创建和管理数据库
3.创建表
4. 修改表
5. 删除表
6.总结

